Saturday, May 7, 2011

Tutorials Main List

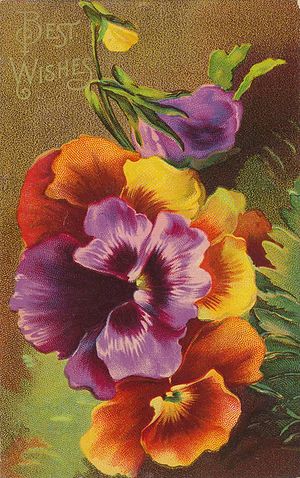
Greeting Card, ca 1900.Image via Wikipedia
When I first started out with card making a couple of years ago, I marvelled at the beautiful and creative handmade cards that people would regularly create, and I started to think there was more to card making then just cutting up and sticking down pices of coloured paper with greetings I printed out on my computer.

And so began my journey into the wonderful and incredibly jouyful world of papercrafting, rubber stamping and card making.

This post is the main list that contains the links to all my articles on this topic. Enjoy!!


  • Introduction - Why I decided to make cards.
  • Equipment
    • Paper and Card
    • Rubber stamps
    • Inks and colours
    • Glitters and powders
    • Basic Tools
    • Advanced Tools
  • Workshops
    • Design principles and layouts
    • Sketches
    • Using the stampa-ma-jig
    • Hot embossing

Note: This is a work in progress so keep an eye out for the articles fresh out of the oven, by subscribing to my blog. Cheers and have fun!!


Enhanced by Zemanta

Saturday, April 16, 2011

I've got the Flu :(

Took a day off from work this friday, because I started feeling quite poorly. I have come down with a massive case of the flu. Ah well, I suppose I could a) Clean up my craft room! (I have tried doing this several times.)
b) Write up a blog post about a very interesting artistic concept on the Golden ratio, and how it pertains to cards and scrapbook layouts, or

c) Make some more cards.
Any guesses as to what I did first? :) I really have to get my craft room cleant, it really is annoying when you can't find the scissors, even though you've just used them a moment ago!!

Hope to get better soon, Thanks for reading my moan.
Till next time,

Enhanced by Zemanta

Sunday, April 3, 2011

Mother's day cake and card.

To share the joy of Mother's day and to thank her for all the goodness and love, I baked my mum a cake and made her a handmade card to go with it.


My dad and brother also signed and wrote little messages for her inside the card, because she calls all of us her babies, including my dad!

The cake turned out soft and spongy, I really do love Betty Crocker cake mixes :)

I've entered this handmade card into the wagsnwhiskers challenge.
Till next time,

Thursday, March 24, 2011

I'm a Stampin' Up demonstrator!

I've joined Stampin' Up. Initially I was tempted by the Starter Kit which is great value for money! Check out my detailed post about the kit here. But really, it was the allure of being an outsider and viewing the Stapin up family with great interest. These ladies always seem to be having a ball. Besides getting a nice discount, and the ability to earn a spot, there's also the added benefit of making loads of new friends all the while doing something you love! Crafting!!

So I caved in, as a present to myself for being such a good girl :) Will keep you posted on how the journey progresses, for I'm sure its going to be a lovely one!
Till next time,

Saturday, January 29, 2011

Winter Birthday Card.

I decided to make a Winter Birthday card to enter in the DCD Christmas Club Challenge.

As usual, I looked through my stash, and found a beautiful image in my Snowman paper collection. So I decided to use it as the topper in my card.

After cutting out my image, I realized that I wanted the hug to be highlighted as the background wasn't central to the emotion of love I wanted to convey in this card. So I used my distress inks, walnut stain, peeled paint and broken china to gently distress the edges, leaving the central area bright as compared to the edges, thus drawing in the focus.

I then used the IC card sketch to guide my way.

Here's the finished card, I hope you like it!


I have entered this card into the following challenges;
  1. DCD Christmas Club Challenge
  2. IC card sketch

Till next time,

Wednesday, January 26, 2011

Spring and distressed looks.


I am absolutely loving my Tim holtz distress inks, they are absolutely versatile and give amazing distressed effects to even the simplest of cards.

Can you see the hidden rabbit? I love this topper, and I wanted the rabbit to look shy :)

Multi embossed grasses in black and silver, with a dash of peeled paint distress inks complete the look. I also misted the topper with Glimmer mists for a delicate shimmer.

Hope you like this card, A glimpse of the spring to come!!

I've entered this card in the following challenges.
  1. Quirky crafts Spring garden challenge
  2. Card Patterns Sketch Challenge

Till next time,

Monday, January 24, 2011

Chinese New Year Card

This year, the Chinese new year is on the 3rd of February.  I made this little card to celebrate and join in the festivities in the year of the rabbit.


I made this card using Tim Holtz distressing inks from Ranger - Broken China and Peeled Paint. Also used the resist embossing technique to draw to make the embossed images POP!

I took inspiration from oriental wall hangings such as the one below,

where multiple panels are hung together to reveal a story. This worked beautifully on this card, don't ya think?

Finally added Text that says "Happy New Year" in Mandarin. The papers I used are Eastern Promise by Dovecraft.

Do let me know what you think. I've entered this card in the Cardmaking and Papercraft challenge.

Till next time,

Bentley Bear - Driving along card

Along with the February 2011 issue of Card making and Papercraft magazine, I got a lovely Bentley bear stamp set.

For some reason, I loved the following stamp. I just had to colour it in! :)


I used my Promarkers with some watercolour pencils for the shading and the puffs of smoke coming out of the car.

Layered it on Holographic card for a nice shiny effect and then stuck it onto my card for a beautiful, albeit simple design.


For the greeting, I used holographic embossing powder, after stamping my image to add a little bling to the card, without being OTT.

For some reason, I had the song by the Beatles - "Baby you can drive my car" in my head while I made this card :)

I've entered this card in the following competition,
I love promarkers challenge 59 - Emboss it.

Hope you like it,

Till next time,

Thursday, January 20, 2011

Tidying up my craft room

Hi all!

Well I've been a naughty girl, and haven't been posting as much as I should. It's this years resolution, but I've already broken it :(

I have been up to even more mischief though, as I've been updating my stash to keep me busy the whole year!! Yay!!

First though, I decided the old carrot on a stick routine. I promised to let myself shop to my heart's content if I tidied up my craft room (which is also my bedroom... ). My mums been after me for quite a while, and I was also heart broken to see that she'd attempted to clear it once, and crumpled my pretty papers in the process!! (the horror!!).

So this is what it looked like before:

[caption id="attachment_141" align="aligncenter" width="300" caption="Before the great tidy up of 2011 began"][/caption]

Here's a few pictures of what it looks like now. I must add that my mum is satisfied with my effort :)


As you can see above, all my Pens and assorted tools go into wonderful transparent jars, that I've saved before they were thrown away to be recycled. In the foreground is a lovely drawer thingymajig that I got for around £2 at my local craft store. I also saved a big cardboard box which I lined with used felt to store all my papers vertically.

[caption id="attachment_144" align="aligncenter" width="300" caption="wonderful to store my knick knacks"][/caption]

[caption id="attachment_145" align="aligncenter" width="135" caption="I made this box, in a magazine holder style."][/caption]

[caption id="attachment_146" align="aligncenter" width="300" caption="My tim holtz ink pads"][/caption]

So next time, I'm going to show you what I bought as an incentive for organising and keeping my craft room clean :)

Do tell me what you think!!

Sunday, January 2, 2011

Art Nouveau Card

Hiya Peeps,

For today's card, I tried to keep things simple and used an art nouveau theme to create a simple but luxury handmade card.

[caption id="attachment_130" align="aligncenter" width="535" caption="Travel, Explore and Discover"][/caption]

To make this card, I used

  1. 13x13cms square cream cardstock.

  2. The image stamp is from the Dover art nouveau cd's printed onto Letraset bleed proof paper and coloured in with Promarkers.

  3. Travel, Explore and Discover stamp from Crafty Individuals.

  4. Gold printed Vellum from Papermania Signature collection.

  5. Gold Mirri Board


To achieve a slightly faded vintage look, I tore a piece of paper and used it to cover 2/3rd of my card, after which I stamped my motifs using brown/copper ink pads.

I'm also loving the Dovecraft ready stick ribbons in their Christmas fancy and jolly happy Christmas collections.I've used the ribbon here from the Jolly Happy Christmas stick-on ribbon for a card that is far from christmassy.

I've entered this card in the following challenges:

Hope you like it!

Till next time,

My first Vintage Card

I'm starting to love the vintage card trend. Distressed Cards and the like are really gorgeous ways to create trendy cards.

I don't have any specialist distressing or vintage tools, and so I used the best tool at my disposal - imagination! :)

Bit Cheeky, I know, But I am proud of the result. Me thinks it will make a lovely thank you card or even a more generic Best wishes card.
[caption id="attachment_118" align="aligncenter" width="535" caption="Vintage Looks"][/caption]

Saturday, January 1, 2011

Happy New Year !!


To all my readers and friends, a very happy, fun filled handmade new year!!